Description
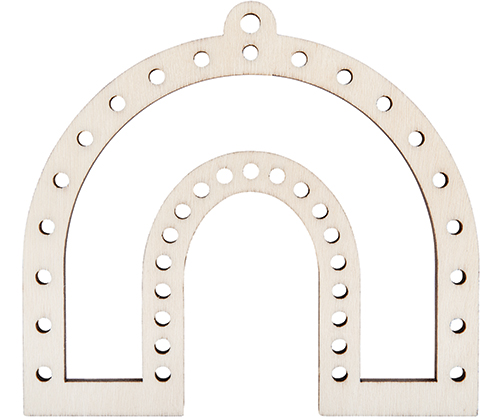
Wooden Weaving Rainbows are a fun and easy textile project that develops fine motor skills and explores line, colour, texture and pattern – best of all, it’s suitable for all ages. Experiment with different threads, wool and fibres to create colourful, textured and eye-catching patterns. These Wooden Weaving Rainbows can be used as ornaments, gifts, door hangers and mobiles.
Wooden Weaving Rainbows are made from 5mm thick, FSC plywood.
Rainbow are approximately 11 x 10cm, and have a 3mm hole. NB Hole will fit a Plastic Weaving Needle or Chenille Needle.
How to Weave
The WARP is the yarn which is strung across the loom and forms the structure for the WEFT. NB: The warp should be strung with a slight tension and spring.
WEFT is the fibre that passes through the warp and ultimately holds the weave together. The weft is used to add woven patterns, designs and add textures. The weft can be any choice of fibre including wool, roving, threads, string, raffia etc.
Preparing the loom: adding the WARP.
- Start at the inside bottom corner of the loom. Secure the warp to the first hole with a double knot.
- Pull the warp ACROSS to the adjacent hole to its right. Thread the warp down through the hole, and then UP through the next hole along.
- Continue to warp the thread across and around the loom, working left to right, ensuring to loop though each hole.
- When the warp reaches the end of the loom, secure the tail to the last hole.
Begin the weave, add the WEFT:
- Thread a large eye needle (e.g. Plastic Weaving Needle or Chenille Needle) with your chosen weft. The weft needs to be long enough to pass at least once across the loom. Be sure to leave a 3cm tail on each weft thread – these can be stitched back into the design once the weave is completed.
- Starting at the inside base of the rainbow loom, pass the needle under the first warp thread, over the second, and under the third etc, until the weft has passed all the way around.
- To create the second row, loop around the first warp thread, and then pass the weft from left to right, reversing the weave pattern on the previous row.
- Continue to weave more rows until the rainbow is filled out.
TIPS
- Do not pull the weft threads tight as this will distort your design and cause your loom to bow.
- Gently push the weft rows together, so that the threads are snug, and there are no gaps.
- Changing colours and how to insert a new thread: Never knot weft threads together. Simply insert and weave the new weft into the design following the above steps, ensuring to leave a 3cm tail.
- Experiment with different stitches and embroidery techniques to add pattern and texture to woven shape.
- Colour the wooden frame with Paint Sticks and other collage materials


